Making a Candlestick - Tutorial
I have been trying to find a suitable candlestick for my wizards house for quite a while without success. I finally worked out how to make one so I thought I wouls share it with you all.
It is made from thin metal, you can buy this but I got mine from an old tomato puree tube which I washed out and flattened.
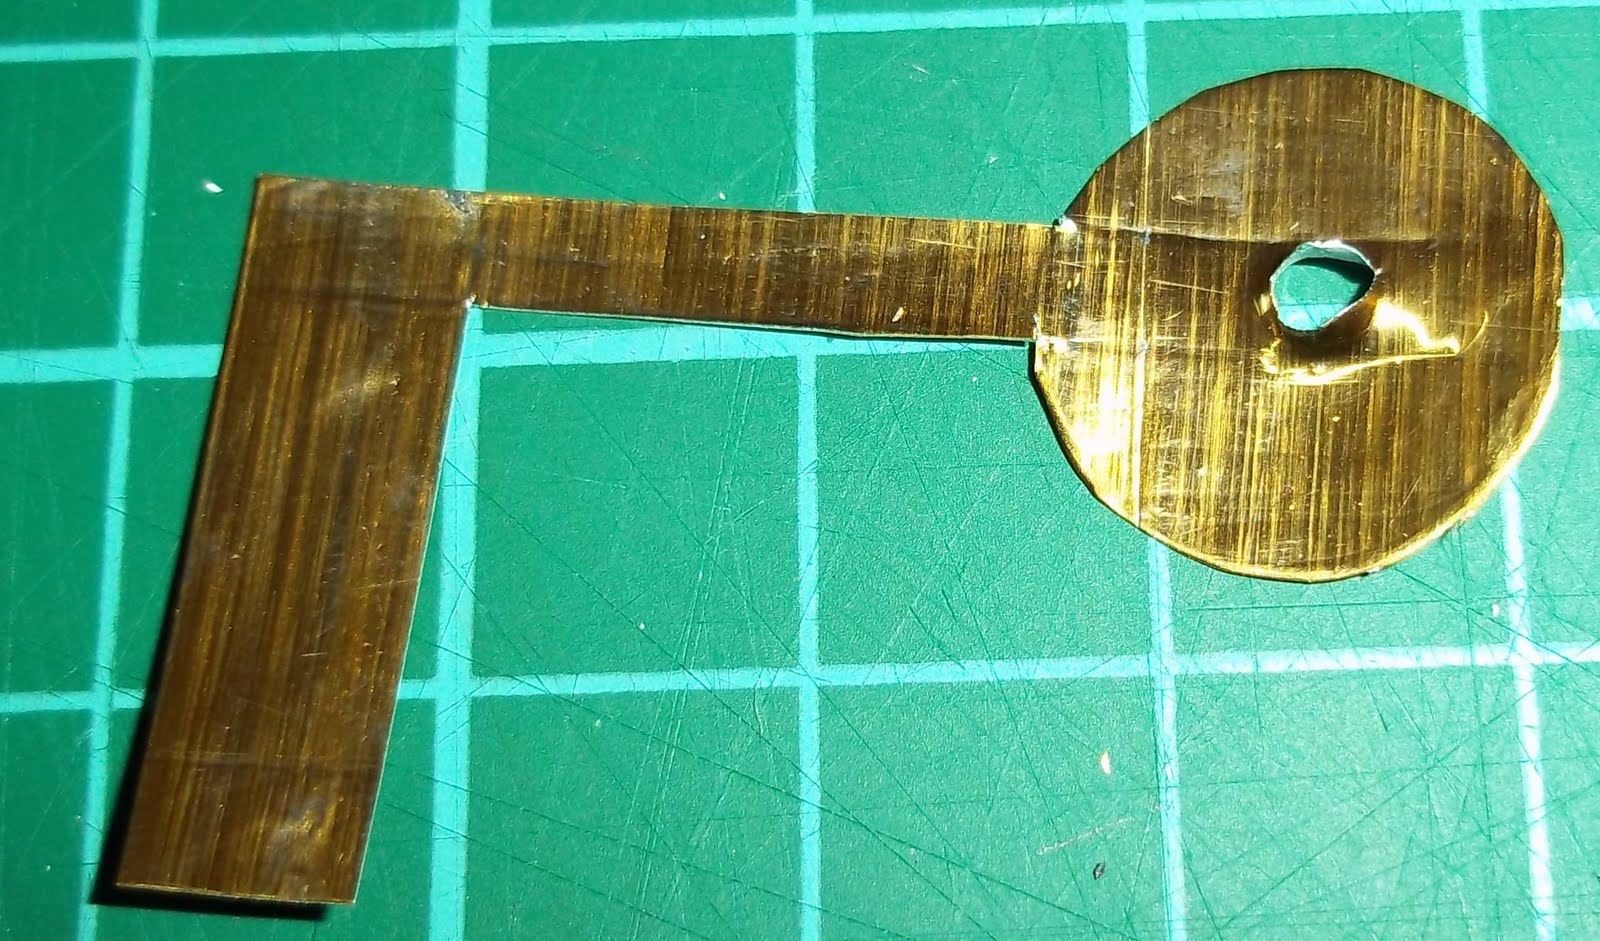
The first step is to mark out the key shaped pattern shown below.
The circle part of the pattern measures 15mm diameter. You could print off this picture and size it to make your own.
I used curved scissors to cut out the circle and straight scissors to cut out the rest of the shape.
Using a sharp tool I pushed a hole up through the middle of the circle. The metal sticks up but this is OK as it will be covered later.
Next I used a ball tool and a circle template to shape the base of the candlestick so it bends upwards.
Then I curled the fatter part of the metal strip around an orange stick. This will form the part that will hold the candle.
Next I bent this newly formed part down to the hole and glued it in place. I used PVA but it needed to be clamped while it dried. I also used tweezers to bend over the top lip slightly.
To make my candlestick look bronze I first painted it with black paint. I used Humbrol black satin as it covers well but it does take a while to dry.
Once dry I dry brushed it using folk art metallic antique gold paint.
Finally I made a simple candle using fimo, 3 parts transluscent to 1 part white with a tiny piece of yellow and a tiny piece of light brown, mixed well, shaped and cooked with a cotton wick stuck in the top.
I hope you enjoyed this tutorial. Please feel free to post a link to it on your own blog. I hope to post more in the future so please become a follower of my blog so you will see them. Also I would love to see any candlesticks you make using this method.
Natalie


what a great tutorial! Thank you!!!
ReplyDeleteThanks for this Natalie. I would love to put a link on my blog sometime this week.
ReplyDeleteThe clay is coming along well too.
Thanks for all the comments Janice, just worked out how to view them. I would love you to put a link to my blog on yours. The foam board is really easy to use and you can buy it in big A2 sheets from Hobbicraft for about £5 a sheet. The only flaw I have found with it is that it warps with paperclay on large projects, as the paperclay dries it twists the structure very slightly but I have had no warping with the papier mache which finally is all dry!
ReplyDeleteHi, Natalie:))) Thank you for great tutorial, I wil try it:))))
ReplyDeleteHugs from Alienora
Thank you for posting I've been looking to make some for the candle lights on my Christmas tree yours can easily be altered
ReplyDelete